
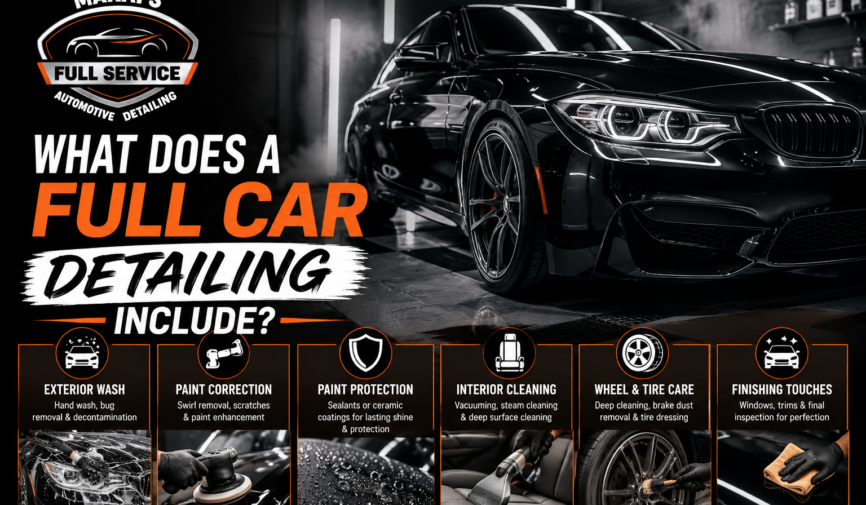
What Does a Full Car Detailing Include? Complete Checklist & Expert Guide (2026)
A full car detailing is a complete, top-to-bottom cleaning, restoration, and protection service for your vehicle interior and exteriors. It is fundamentally different from a standard car wash in both depth and purpose.
A car wash removes visible surface dirt. A full detail goes far beyond that: it decontaminates bonded paint pollutants invisible to the naked eye, deep cleans every interior surface, restores faded or damaged materials, and applies protective treatments designed to preserve the vehicle’s condition over time.
The goal is not just a clean car. It’s a car that looks better, lasts longer, and holds higher resale value.
“A full detail typically takes 4–8 hours for a standard vehicle. Larger vehicles, paint correction, or ceramic coating can extend this to 12+ hours. Any service completed in under two hours is almost certainly not a full detail regardless of what it’s called.“
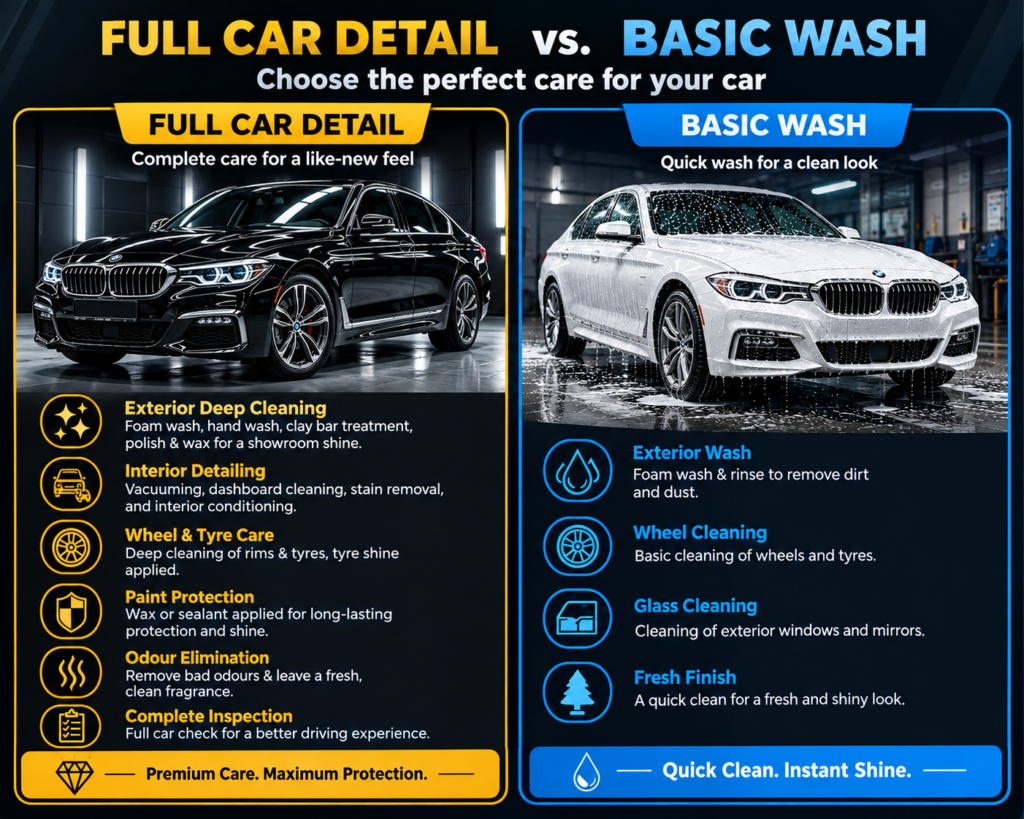
Full Car Detail vs. Basic Wash: The Key Differences
| Feature | Basic Car Wash | Full Car Detail |
|---|---|---|
| Exterior wash | Yes | Yes (hand wash) |
| Automated brushes | Often | Never |
| Paint decontamination (clay) | No | Yes |
| Paint polish / correction | No | Yes (where needed) |
| Wax / sealant / coating | Rarely | Yes |
| Interior vacuum | Light | Deep (every crevice) |
| Carpet shampooing | No | Yes |
| Leather conditioning | No | Yes |
| Dashboard & trim restoration | Wipe only | Deep clean + protection |
| Glass polishing (inside+out) | Rinse only | Yes |
| Wheel & tyre deep clean | Rinse | Dedicated treatment |
| Engine bay cleaning | No | Optional add-on |
| Duration | 10–30 min | 4–12+ hours |
What Does Exterior Car Detailing Include
The exterior car detailing is not simply a wash. It is a multi-stage process that progressively cleans, decontaminates, corrects, and protects the paint and all external surfaces.
Stage 1: Pre-Wash and Wheels First
Why wheels first?
Wheels are the dirtiest part of any vehicle. Cleaning them first prevents brake dust, road tar, and chemical cleaners from contaminating panels you’ve already cleaned.
What’s included:
- Wheel cleaner application: A dedicated iron-dissolving or pH-balanced wheel cleaner is sprayed onto wheels and left to dwell. High-quality formulas chemically react with iron particles (brake dust), causing them to bleed red or purple — a visible confirmation the product is working.
- Brush agitation: Multiple brushes used a spoke brush for the wheel face, a barrel brush for the inside, and a lug nut brush for recesses.
- Wheel arch and tyre cleaning: Inner wheel arches cleaned with brush and degreaser; tyre cleaner applied to strip old dressing, road film, and brown oxidation.
- Pre-rinse of the full vehicle: The entire car is thoroughly rinsed to remove loose dirt before any washing begins. Skipping this step risks dragging loose particles across paint — a major cause of fine scratches.
- Snow foam / pre-wash foam: A thick foam applied via foam cannon and left to dwell. This is not a wash — it’s a pre-cleaning step that breaks down surface contamination before any physical contact with the paint.
Stage 2: The Hand Wash (Two-Bucket Method)
A full detail never uses automated brush car washes. Rotating brushes cause micro-scratches and swirl marks that dull paint over time. All washing is done by hand.
The two-bucket method — the industry standard for scratch-free washing:
- Bucket 1: Clean pH-balanced car shampoo — used to load the wash mitt
- Bucket 2: Clean rinse water — used to rinse the mitt before reloading, preventing dirt from re-entering the soap solution
What’s washed:
- All painted body panels — worked panel by panel, top to bottom
- Door jambs, boot jambs, and fuel filler cap area — often skipped in lesser washes
- Lower sills, bumpers, window glass, trim, badges, and antenna
After washing, the car is thoroughly rinsed and dried using clean microfibre drying towels or a controlled air blower never chamois leathers, which drag and scratch.
Stage 3: Paint Decontamination (Chemical + Clay Bar)
Even after a thorough wash, a vehicle’s paint is rarely truly clean. Certain contaminants chemically bond to the clear coat and cannot be removed by washing alone.
What bonds to paint and won’t wash off:
- Iron particles from brake dust and rail dust — embed at speed and oxidise
- Industrial fallout — metallic particles in urban air environments
- Road tar — bonds through heat and UV exposure
- Tree sap — adheres to paint and hardens over time
- Paint overspray — from nearby roadworks or construction
“The plastic bag test: Run your hand in a plastic bag over a clean, washed panel. If it feels rough or gritty, the paint is contaminated even though it looks clean.“
Chemical decontamination:
An iron remover spray is applied to all painted surfaces. As it reacts with embedded iron particles, it bleeds purple or red — confirming it’s working. This is rinsed off after dwelling.
Mechanical decontamination (clay bar):
A detailing clay bar is used with dedicated lubricant to physically lift contaminants from the clear coat. The clay bar’s adhesive surface grabs and removes particles that chemical decontamination didn’t fully dislodge. After claying, paint should feel smooth as glass.
“Clay bar decontamination is essential before applying any wax, sealant, or ceramic coating. Applying protection over contaminated paint dramatically reduces bonding strength and product longevity.“
Stage 4: Paint Inspection and Correction
Once the paint is clean and decontaminated, the detailer inspects it under bright lighting to assess its true condition.
What they look for:
- Swirl marks — fine circular scratches from improper washing (brush car washes, dirty mitts, wiping with a dry cloth)
- Buffer trails — heavier curved scratch patterns from inexpert machine polishing
- Random deep scratches — from car park incidents, keys, or abrasive contact
- Oxidation — dull, chalky paint from UV degradation of the clear coat
- Water spot etching — mineral deposits that have etched into the clear coat
Paint correction uses a dual-action or rotary polishing machine with progressively finer cutting compounds to abrade a microscopic layer of clear coat, levelling the surface and removing scratches within it.
“Important: Paint correction is not always included in a standard full detail package. If your car has significant paint defects, ask specifically whether correction is included or priced separately.“
Stage 5: Paint Protection Application
Once paint is clean, decontaminated, and corrected (where needed), a protective layer is applied. This preserves the work done and protects the paint going forward.
Carnauba Wax
- Natural wax derived from carnauba palm leaves
- Provides a warm, deep gloss — particularly desirable on classic and dark-coloured vehicles
- Protection duration: 6–12 weeks depending on exposure and wash frequency
Paint Sealant (Synthetic)
- Polymer-based synthetic protection with better durability than natural wax
- Typically lasts 4–6 months; good choice for daily drivers in harsh conditions
Ceramic Coating
- Semi-permanent silica-based coating that chemically bonds to the clear coat
- Dramatically harder than wax or sealant — provides significant scratch resistance
- Hydrophobic: water and contaminants bead and slide off
- Durability: 2–5 years depending on grade; requires properly prepared paint to bond
Stage 6: Glass Polishing and Cleaning (Exterior)
- All exterior glass cleaned with dedicated automotive glass cleaner
- Removal of water spots, road film, and mineral deposits
- Rubber seals and trim around windows cleaned
- Premium services: glass polishing with a glass-specific polish to remove light scratches and wiper marks, improving clarity
Windscreen scratches and heavy water spot etching may require dedicated glass polishing confirm whether this is included in your package.
Stage 7: Tyre Dressing and Trim Restoration
Tyre dressing:
After cleaning, a tyre dressing is applied to the sidewalls. Professional dressings provide a satin to medium gloss finish not the unnaturally high-shine look of cheap aerosol products and contain UV inhibitors that slow rubber degradation and cracking.
Exterior trim restoration:
Plastic trim fades and turns grey through UV exposure. A professional detailer applies a trim restorer that restores rich colour, provides UV protection, and does not leave a greasy overspray-style finish on surrounding paint.
Stage 8: Door Jambs and Shuts
A detail that ignores the door jambs is not a full detail. These areas the edges of doors, the B-pillar, and rubber seals — accumulate significant dirt and are visible every time a door opens.
Door jambs are cleaned with a dedicated all-purpose cleaner, dried thoroughly, and in some cases dressed with a trim protectant. Rubber seals are treated with a seal conditioner to prevent drying and cracking.
What Does Interior Car Detailing Include
The interior car detailing is often where the most dramatic transformation occurs and where the most variables exist depending on the vehicle’s condition and use.
Stage 1: Full Strip-Out and Vacuum
Before any cleaning products are used, the interior is thoroughly vacuumed every surface, every crevice. Professional detailers use compressed air or a detail blower to first dislodge hidden debris from gaps, vents, and crevices then vacuum it up.
What’s vacuumed:
- All seats (front, rear, underseat space)
- Full carpets and floor mats
- Boot / cargo area
- Headliner (carefully — see Stage 7)
- Dashboard and instrument panel crevices
- Air vents (using a dedicated vent brush)
- Door pockets, map pockets, centre console, cup holders, seatback pockets
Stage 2: Carpet and Floor Mat Deep Clean
Vacuuming removes loose debris. Deep cleaning removes embedded dirt, stains, and odour-causing bacteria from carpet fibres.
The process:
- Floor mats removed and set aside for separate treatment
- Carpet cleaner or pre-spray applied to all carpeted areas
- Agitated with a stiff brush to lift embedded dirt
- Hot water extraction: A professional extractor machine injects hot water and cleaning solution into the carpet and simultaneously vacuums it out far more effective than scrubbing alone
- Carpets left to dry (air movers often placed inside the vehicle)
- Floor mats shampooed, scrubbed, rinsed, and dried separately
- Heavily soiled or stained carpets may require multiple extraction passes. Some old, set-in stains may not fully disappear a professional will advise before the job
Stage 3: Seat Cleaning (Fabric and Leather)
Fabric / cloth seats:
- Fabric cleaner applied and agitated with a brush
- Hot water extraction to remove shampoo, lifted dirt, and moisture
- Stains treated individually with stain-specific products
Leather seats:
Leather requires a completely different approach. Using the wrong products especially alkaline or harsh cleaners strips natural oils and accelerates cracking.
- pH-balanced leather cleaner applied with a soft brush or microfibre applicator
- Cleaned in sections and wiped clean
- Leather conditioner applied after cleaning — this step is critical. Leather dries out in hot climates or UV-exposed interiors. Conditioning restores moisture and flexibility, preventing cracking and premature aging.
Perforated leather requires special care excess moisture seeps through perforations into the foam beneath. Experienced detailers use minimal moisture and work quickly when cleaning perforated leather.
Stage 4: Dashboard, Door Cards, and Hard Surfaces
What’s cleaned:
- Dashboard and instrument panel — cleaned with dedicated interior cleaner and soft brushes; product applied to cloth/brush, never sprayed directly onto electronics
- Centre console — including crevices, button gaps, and storage areas
- Door panels and door cards — including armrests, speaker grilles, and map pockets
- Gear selector and gear knob
- Steering wheel — sanitised; high-touch surfaces accumulate significant bacteria and body oils
- Seat adjusters and rails — often overlooked; accumulate significant grime
- Pillar trims (A, B, C) — cleaned and dressed
After cleaning, a UV-protective dressing is applied to all plastic and rubber surfaces giving a clean, factory-like finish; protecting against UV degradation; and repelling dust slightly to ease future cleaning.
Stage 5: Interior Glass Cleaning
Interior glass builds up a distinctive hazy film a combination of outgassing from plastics and vinyl, body oils, and airborne particles. This is particularly noticeable when driving into low sun.
- Dedicated glass cleaner applied to microfibre cloth (never sprayed directly risk of contaminating electronics)
- Cleaned in two stages: first pass removes film, second pass removes streaks
- Cleaned right into the edges and corners where film accumulates most
Stage 6: Air Vents and HVAC
Air vents are cleaned with dedicated vent brushes accessing individual fins and blades. In a full detail, vents are also disinfected they accumulate mould, bacteria, and allergens that circulate through the cabin when the air conditioning runs.
In premium interior details, an HVAC disinfection treatment is applied through the air intake system to sanitise the full ducting, evaporator, and fan eliminating the musty smell that often comes from cabin air conditioning.
Stage 7: Headliner Cleaning
The headliner is the fabric-covered ceiling of the cabin one of the most delicate interior surfaces and most commonly neglected.
Critical: The headliner is fabric stretched over a cardboard substrate. Over-saturating it with liquid causes the substrate to delaminate permanently sagging the headliner. This is an expensive repair.
Professional cleaning involves light agitation with a damp (not wet) brush and appropriate fabric cleaner, immediate blotting to remove moisture, and air drying only. Common issues treated: smoke staining, watermarks, general darkening from body oils.
Stage 8: Seatbelts
Seatbelts are pulled fully out and cleaned they absorb sweat, body oils, and odours with every journey but are rarely cleaned by car owners. A fabric cleaner is worked into the belt material and allowed to dry in the extended position.
Stage 9: Odour Elimination
Surface odours (most common):
Eliminated through thorough cleaning. Once the source material stained carpet, soiled upholstery is properly cleaned, the odour goes with it.
Embedded odours (smoke, pet, mildew):
- Ozone treatment: An ozone generator placed inside the sealed vehicle runs for a set period. Ozone (O₃) is a powerful oxidiser that neutralises odour molecules at a molecular level including smoke, mildew, and pet odours. The vehicle must be vacated during treatment.
- Enzyme treatments: Applied to the source area to biologically break down odour-causing organic matter particularly effective for urine and food spills.
- Fogger treatments: A fine mist of deodorising solution distributed through the cabin.
Air fresheners are not odour elimination they are odour masking. A professional detail should eliminate the source, not cover it.
Stage 10: Final Wipe-Down and Inspection
After all surfaces are clean and dry, the detailer performs a final wipe-down using a clean microfibre cloth to catch any remaining residue or fingerprints, followed by a thorough inspection under adequate lighting. Any missed spots, streaks on glass, or uneven dressing are corrected before the vehicle is returned.
What Engine Bay Cleaning Include (Optional Add-On)
Engine bay cleaning is not universally included in a full detail in many shops it’s an additional service.
What engine bay cleaning achieves:
- Removes grease, oil residue, road dust, and grime
- Makes leak identification significantly easier a clean bay reveals oil seeps, coolant leaks, and fluid stains immediately
- Improves appearance for buyers inspecting a vehicle for purchase
The professional process:
- All electrical components, sensors, and the battery are protected
- Degreaser is applied and allowed to dwell
- Low-pressure rinsing not high-pressure blasting (which forces water into sensitive components)
- Air dried using compressed air
- Plastic and rubber components treated with an appropriate protectant
Engine bay cleaning done incorrectly particularly with a high-pressure washer and unprotected electrical components can cause electrical faults. Always use a professional who understands the risks.
What a Full Car Detailing Does NOT Include (Unless Specified)
Understanding what’s typically excluded prevents mismatched expectations. Always ask for a clear, written scope of work before booking.
| Service | Status in Standard Full Detail |
|---|---|
| Paint correction (swirl removal) | Often priced separately or as an add-on |
| Ceramic coating application | Separate service — priced by grade and size |
| Paint protection film (PPF) | Separate specialist service |
| Engine bay cleaning | Add-on in most shops |
| Headlight restoration | Often priced separately |
| Leather repair / re-dyeing | Specialist service beyond detailing |
| Scratch touch-up or chip repair | Bodywork — not detailing |
| Odour elimination (ozone) | Sometimes an add-on |
| Convertible roof cleaning | Often priced separately |
The Complete Full Car Detailing Checklist
Exterior Car Detailing Checklist
- Wheels and tyres cleaned (dedicated brushes, wheel cleaner)
- Wheel arches cleaned
- Pre-rinse (full vehicle)
- Snow foam / pre-wash applied and rinsed
- Hand wash (two-bucket method, pH-balanced shampoo)
- Door jambs and boot jambs cleaned
- Rinse and safe dry (microfibre or air blower)
- Chemical decontamination (iron remover)
- Mechanical decontamination (clay bar)
- Paint inspection (panel light)
- Paint correction / polishing (where needed)
- Protection applied (wax, sealant, or ceramic coating)
- Exterior glass cleaned and polished
- Tyre dressing applied
- Plastic trim restored and protected
- Final exterior inspection
Interior Car Detailing Checklist
- Compressed air / blower used in vents and crevices
- Full vacuum (seats, carpets, boot, headliner)
- Floor mats removed and shampooed separately
- Carpets pre-treated and hot water extracted
- Fabric seats cleaned and extracted
- Leather seats cleaned (pH-balanced cleaner)
- Leather conditioner applied
- Dashboard and instrument panel cleaned
- Centre console deep cleaned
- Door panels and cards cleaned
- Steering wheel cleaned and sanitised
- Air vents cleaned and disinfected
- Interior glass cleaned (both passes)
- Headliner cleaned
- Seatbelts cleaned
- Pillar trims cleaned
- UV protectant applied to all plastics and trim
- Odour treatment applied (if needed)
- Final wipe-down and inspection
Engine Bay Checklist
- Electrics protected before cleaning
- Degreaser applied and dwelled
- Low-pressure rinse
- Air dried thoroughly
- Plastics and rubbers dressed
How to Tell If You Received a Genuine Full Car Detailing
Check the exterior:
- Run your hand across a panel in a plastic bag — it should feel completely smooth (no grit)
- Water should bead tightly on all painted surfaces
- No swirl marks visible on the bonnet in direct sunlight (if correction was included)
- Tyres should have an even, clean dressing — not patchy or over-saturated
- Door jambs should be clean — not just wiped around the edges
Check the interior:
- No residual odour of cleaning products — just clean
- Carpets should feel firm and slightly damp (or dry if time has passed) — not soaking
- All surfaces, including air vent fins, should be dust-free
- Interior glass should be streak-free at all angles — including in direct sunlight
- Leather should feel conditioned and supple — not dry or sticky
10 Questions to Ask Your Detailer Before Booking
A confident, professional detailer answers these clearly. Hesitation or vagueness should prompt caution.
- What exactly is included in your full detail package — can you list every step?
- Do you use the two-bucket wash method or a single bucket?
- Is clay bar decontamination included?
- Is paint correction included, or is it an add-on?
- What protection product do you apply — wax, sealant, or ceramic?
- How do you clean leather — and do you apply conditioner afterwards?
- Do you use hot water extraction for carpets?
- Is engine bay cleaning included or an add-on?
- How long will the service take?
- What specific products do you use? (Professional-grade vs. supermarket brands)
The Bottom Line
A full car detail is one of the best investments you can make in your vehicle. Done correctly, it doesn’t just clean — it restores, protects, and preserves every surface, extending the life of your paint, interior materials, and overall condition.
The key word is correctly. A genuine full detail takes hours, follows a specific sequence, uses purpose-made professional products, and includes stages — decontamination, correction, protection — that a standard car wash never touches.
Use the checklist above to understand exactly what you should be getting. Ask questions before you book. And choose a detailer who can confidently answer every one of them. Your car deserves the real thing — not just the name.
Looking for more? Read our guides on how to prepare for a detailing appointment.