

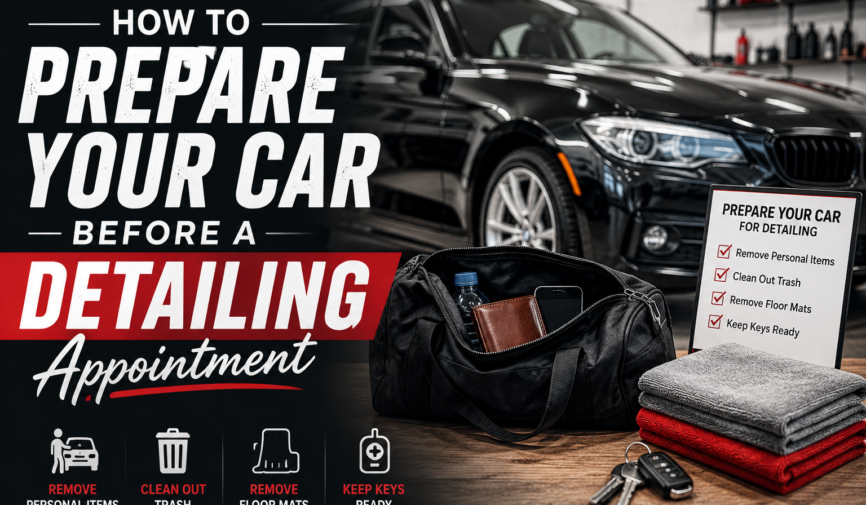
How to Prepare Your Car Before a Detailing Appointment: Expert Guide
Most car owners show up to their detailing appointment and hand over the keys. The ones who get the best results do a few specific things first. Here’s exactly what professionals recommend and why it matters.
Why to prepare your car before a detailing a real difference
Car detailing is not a surface clean. It’s a thorough, multi-stage process that can take anywhere from three to twelve hours depending on the services booked. When you arrive prepared, your detailer can spend every minute doing what they’re trained to do polishing, correcting, protecting, and restoring instead of spending the first hour clearing out your back seat.
Proper preparation does three concrete things:
1. Maximises results — the detailer can access every surface and give full attention to problem areas
2. Saves time — pre-appointment prep can reduce detailing time, which in some cases reduces cost
3. Protects you — documenting your car’s condition before it leaves your hands is simply good practice
This guide covers everything you need to do before handing over your keys, from two days before the appointment to five minutes before drop-off. It also covers what NOT to do a section most guides skip, but which is just as important.
Steps on how to prepare your car before a detailing appointment
Step 1: Know What Service You’re Booking
The single most overlooked preparation step happens before the appointment is even confirmed. Understanding exactly what you’re paying for helps you set realistic expectations and communicate clearly with the detailer.
Car detailing is a broad term that covers a wide range of services:
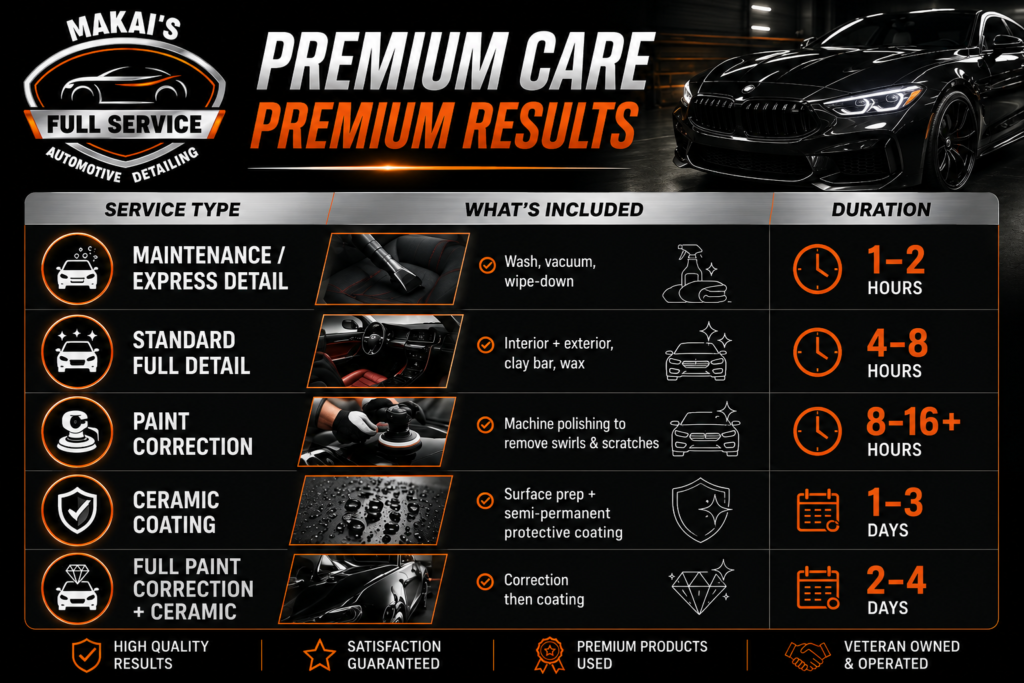
| Service Type | What’s Included | Duration |
| Maintenance / Express Detail | Wash, vacuum, wipe-down | 1–2 hours |
| Standard Full Detail | Interior + exterior, clay bar, wax | 4–8 hours |
| Paint Correction | Machine polishing to remove swirls & scratches | 8–16+ hours |
| Ceramic Coating | Surface prep + semi-permanent protective coating | 1–3 days |
| Full Paint Correction + Ceramic | Correction then coating | 2–4 days |
Before your appointment, clarify:
- What exactly is included in the package you’ve booked
- What is not included (e.g., engine bay, headliner, convertible roof)
- Whether there are add-on services available and at what cost
- How long the service will take, so you can arrange alternative transport
A detailer who gives vague answers to these questions is worth approaching cautiously. Professional shops can clearly explain every step of the process and what products they use.
Step 2: Inspect Your Car 48 Hours Before the Appointment
Two days before your appointment, walk around your car inside and out with fresh eyes. You’re not cleaning it yet. You’re documenting and noting anything the detailer needs to know.
Exterior Inspection
Walk around the vehicle in good lighting ideally in direct sunlight or under a bright artificial light. Look for:
- Scratches and rock chips — note their location and depth
- Swirl marks — most visible on dark-coloured panels; look at the reflection on the bonnet or doors
- Oxidation or chalky paint — common on bonnets, roofs, and bumpers of older vehicles
- Water spots — mineral deposits that appear as white or grey haze
- Dents or damage — note these clearly so there’s no dispute after the appointment
- Peeling trim or paint — detailing can improve appearance but won’t fix structural issues
- Aftermarket accessories — roof racks, bike mounts, magnetic signs decide if they stay or come off
Why this matters: If a scratch exists before your appointment and you haven’t noted it, it becomes unclear later whether it was pre-existing or occurred during detailing. Photograph every imperfection with a timestamp.
Interior Inspection
Go through the interior and note:
- Stubborn stains on seats, carpets, or the headliner
- Odours (food, smoke, mildew, pet) be specific, don’t just say “it smells a bit”
- Damaged leather that needs conditioning or repair
- Any electronics, wiring, or aftermarket installations the detailer should be aware of
Step 3: Photograph Everything
This step is not optional. Before any detailing appointment especially for paint correction or ceramic coating photograph both the interior and exterior thoroughly.
Take photos of:
- All four sides of the exterior in good lighting
- The bonnet and roof (often the most neglected panels)
- Any pre-existing scratches, chips, or dents (close-up)
- The interior: seats, carpets, dashboard, door cards
- Any damage or stains you’ve already noted
Store the photos with a clear date stamp. This protects both you and the detailer and creates a baseline you can compare against when you collect the vehicle.
Step 4: Remove All Personal Belongings
This is the most practical step and one that directly affects the quality of your detail. A professional detailer cannot thoroughly clean your interior if it’s full of your personal items.
Clear out everything from:
- Front and rear seats — jackets, bags, water bottles, sunglasses
- Glove box and centre console — documents, cables, coins, pens
- Door pockets — rubbish, receipts, umbrellas
- Boot / cargo area — shopping bags, sports equipment, tools
- Cup holders and storage compartments — loose change, wrappers, stationery
- Seatback pockets — maps, books, children’s items
Important: Remove anything containing personal information like bank cards, insurance documents, home addresses. This is basic personal security.
Child seats and accessories: If you have child seats or organiser accessories fitted, remove them before the appointment unless you’ve agreed with the detailer that they’ll handle removal and reinstallation.
What happens if you don’t? Some detailers charge an additional clutter removal fee if the interior requires significant time to clear before cleaning can begin. More importantly, they will spend less time on the actual detailing.
Step 5: Remove Rubbish and Large Debris
Separate from personal belongings, remove all rubbish and loose debris:
- Fast food wrappers, cups, receipts
- Empty bottles and cans
- Loose dirt, gravel, or sand that’s accumulated in the footwells
- Pet hair — use a lint roller or rubber glove to pull up what you can from seats
Do NOT deep-clean the interior yourself before going. A quick tidy is helpful; spending an hour scrubbing is not. That’s what you’re paying the professional to do — and your technique may be less effective than theirs.
Step 6: Give the Exterior a Basic Rinse (Only if Extremely Dirty)
Here’s a point that confuses many people: You do not need to wash your car before a full detailing appointment. Exterior washing is included in virtually all full detailing packages.
However, there is one exception worth knowing. If your vehicle is exceptionally dirty heavily caked mud from off-road driving, thick construction dust, accumulated winter salt, or farm residue some detailers may request a pre-rinse or may charge an additional fee for the extra prep labour.
For normally dirty everyday vehicles, arrive as-is. Attempting to wash the car yourself before the appointment adds no value and risks introducing swirl marks that the detailer then has to address.
If you do want to do a light rinse: Use clean water only with a hose or pressure washer no soap, no washing mitt. This removes loose surface contamination without the risk of scratching.
Step 7: Communicate Specifically — This Is Critical
The quality of communication before your appointment directly determines the quality of your results. Do not assume the detailer will notice everything or that problems will be addressed automatically.
Tell Your Detailer:
Specific stains: “There’s a coffee stain on the front passenger seat” is actionable. “The interior needs a clean” is not.
Odour issues: Be honest about the source smoke, pet, mildew, food spills. Masking the smell with air freshener before the appointment interferes with the detailer’s ability to identify and treat the actual source.
Paint concerns: If you’re worried about swirl marks, oxidation, or specific scratches, raise this during the booking conversation, not when you drop the car off.
Vehicle-specific issues: Mention any mechanical quirks windows that don’t roll down, a boot that sticks, battery issues, broken door handles.
Existing protection: If your car has a ceramic coating, paint protection film (PPF), or any specific product applied, tell the detailer. Different protection types require different care products.
Step 8: Understand What Detailing Can and Cannot Fix
A significant source of disappointment after detailing appointments comes from unrealistic expectations.
Detailing CAN:
- Remove swirl marks and light scratches through paint correction polishing
- Eliminate most surface oxidation and restore gloss to faded paint
- Remove the majority of interior stains with correct treatment
- Eliminate many odours through steam cleaning and ozone treatment
- Make water spot etching less visible or remove it entirely if caught early
- Restore faded plastic trim and condition leather
Detailing CANNOT:
- Fix deep scratches that have cut through the clear coat — these require touch-up paint or respray
- Remove dents or structural damage — this is bodywork, not detailing
- Fully restore severely oxidised paint that has degraded beyond polishing
- Permanently eliminate odours from badly mould-affected upholstery without replacing the material
- Hide or fill paint chips permanently
Key point about ceramic coatings: Ceramic coatings enhance and protect your paint — they do not hide imperfections. If there are swirl marks or scratches on the paint when a ceramic coating is applied, those defects will be preserved under the coating. If you’re booking a ceramic coating, discuss whether paint correction is needed first.
Step 9: Sort Out Practical Logistics
Transport
Full detailing appointments take anywhere from four to sixteen hours. Arrange how you’ll get to and from the shop before you drop the car off.
Timing
Book your appointment with weather in mind. Freshly detailed paint — particularly newly applied wax, sealant, or ceramic coatings — should not be exposed to rain within the first 24 to 48 hours.
Mid-week appointments (Tuesday through Thursday) typically allow detailers more time and flexibility compared to busy weekend bookings.
Fuel
Ensure you have enough fuel in the tank to allow the detailer to move the vehicle between bays or around the workshop.
Valuables
Remove all valuables before drop-off. Do not leave cash, jewellery, electronic devices, or important documents in the vehicle.
Agree on Collection Time
Confirm the expected completion time and how you’ll be notified. The best detailing shops communicate proactively but asking up front sets clear expectations on both sides.
Step 10: The Drop-Off — What to Do When You Arrive
When you arrive at the detailing shop, take five minutes to do the following:
1. Do a brief walk-around with the detailer — point out the specific concerns you noted during your inspection. If you photographed damage or stains, show the photos.
2. Ask what to expect — confirm the services being performed, the expected completion time, and what the process involves.
3. Confirm any add-on decisions — if you’ve been considering an upgrade (paint correction, ceramic coating, leather conditioning), make the decision now, not halfway through.
4. Leave contact details — make sure the shop has a reliable number to reach you if questions arise during the job.
5. Do a final personal items check — glove box, door pockets, under seats. It’s easy to miss something on the first pass.
Common Mistakes to Avoid
These are the mistakes professionals see most often — and they’re all avoidable.
Spraying Air Freshener to Cover Odours
Masking an odour makes it harder for the detailer to identify and properly treat the source. If your car has a smoke smell, pet odour, or mildew issue, disclose it directly.
Trying to Clean Stains Yourself Before Arrival
Amateur stain treatment — particularly with household cleaning products can set stains permanently and make professional removal harder or impossible. If you have a fresh spill, blot it (don’t rub) and leave the actual treatment to the professional.
Not Disclosing Existing Paint Protection
Applying standard wax or polishing compounds to a ceramic-coated vehicle can degrade the coating. Always tell your detailer what protection is already on the paint.
Arriving Without a Clear Brief
“Just make it look good” is not a useful instruction. The detailer will do their best, but without specific guidance, your priorities may not match their assumptions.
Assuming All Issues Will Be Fixed Automatically
If you don’t mention the stain on the rear seat or the faded trim, there’s no guarantee it’ll receive targeted attention. Specific communication always produces better results.
Booking the Wrong Service
Booking an express wash when your car needs paint correction, or expecting a standard detail to include ceramic coating, creates frustration on both sides. Understand the services and book what your car actually needs.
Pre-Appointment Checklist: Everything in One Place
48 Hours Before
- Inspect and photograph the exterior (all panels, close-ups of any damage)
- Inspect and photograph the interior (seats, carpets, any stains)
- Note all specific concerns to communicate to the detailer
- Confirm what service package is booked and what’s included
- Check the weather forecast for appointment day and 24–48 hours after
Day Before
- Remove all personal belongings from every compartment
- Clear out all rubbish and loose debris
- Remove child seats if agreed with detailer
- Remove aftermarket accessories if they need to come off (roof racks, magnetic signs)
- Arrange transport to and from the shop
Day of Appointment
- Final check of all compartments for missed items and valuables
- Ensure there’s adequate fuel in the tank
- Bring photos of pre-existing damage to show the detailer
- Do a walk-around with the detailer at drop-off and communicate specific concerns
- Confirm completion time and contact number
- Do NOT spray air freshener before arrival
How to Choose a Detailer Worthy of Your Preparation
Transparent about process: A good detailer can explain exactly what products they use, what each step achieves, and how long protection lasts. Vague or evasive answers are a warning sign.
Asks questions before quoting: The best detailers ask about your car’s history, current protection, specific concerns, and goals before giving a price.
Realistic expectations: Trustworthy professionals are honest about limitations. If a scratch is too deep for polishing to fix, they’ll tell you — not take your money and disappoint you.
Reviews with substance: Look for reviews that describe specific results and experiences, not just “great service.” Patterns in reviews tell you more than individual ratings.
Proper facility and equipment: Professional-grade dual-action polishers, proper lighting for paint inspection, a clean workspace, and quality products are signs of a serious operation.
The Bottom Line
Preparing your car before a detailing appointment is not about doing the detailer’s job for them. It’s about showing up organised, informed, and communicative so the professional can do their best work on your vehicle.
The steps are simple: remove your belongings, document your car’s condition, communicate your specific concerns clearly, understand what the service covers, and sort out the logistics in advance.
The result is a better detail, a smoother appointment, and a vehicle that comes back to you in the condition you were hoping for not the condition the detailer thought you wanted.
Your car is a significant investment. Treating a detailing appointment with the same care and preparation you’d bring to any professional service ensures you get the full value of what you’ve paid for.
Have questions about preparing for a specific type of detail ceramic coating, paint correction, or a deep interior clean? Contact Makais Detailing and we’ll help you get ready.